Showing posts with label 04. Show all posts
Showing posts with label 04. Show all posts
Friday, September 29, 2017
Trying Out Ubuntu 10 04 On A Desktop PC Part Two
Trying Out Ubuntu 10 04 On A Desktop PC Part Two
This blog describes the multimedia playback capabilities (both audio and video) of the standard Ubuntu 10.04 - that is, what this 64-bit OS can play out-of-the-box. Let us start with the audio capabilities first.
Multimedia - Audio Playback
It was obvious from the start that Ubuntu can handle sound - but what format? A quick peek into the /usr/share/sounds directory gave me some answers. The sound file formats that Ubuntu can handle out-of-the-box are .wav and .ogg type files. The wav format is an uncompressed PCM one while the ogg format is a lossy compressed one. Both are free formats and that is the reason they were included on a standard Ubuntu (which has a strict policy regarding non-free or propriety formats - they simply are not included).
A test was carried out by plugging in a USB drive containing several audio and video files of various formats, into the Ubuntu 10.04 PC. The USB drive was recognized by the OS and mounted automatically - an icon for that drive appeared on the desktop. The OS also obligingly open the Nautilus file browser showing the contents of the USB drive. Hovering the cursor over the various audio files on the USB drive, I discovered that Ubuntu can indeed play back wav and ogg type audio files plus it also can play back flac type audio files. This format is a lossless compressed PCM type and it is a free format (flac = free lossless audio codec) - hence it was included in the standard Ubuntu. However, out of the box Ubuntu CANNOT play back mp3, mp4, aac, m4a and ape formatted audio files. Obviously, extra non-free or propriety codecs need to be installed to handle these formats.
A quick check with the official Ubuntu 10.04 document did not help much but checking the community document on restricted formats gave instructions on which package to install in order to get support for the other audio (and video) formats. The package is appropriately named ubuntu-restricted-extras and besides the codecs necessary for play back of the other formats, also includes Microsoft TTF fonts, Java runtime environment, Flash plugin, LAME (to create compressed audio files), and DVD playback. Opening the Synaptic Package Manager, I installed this package - which took a while - mainly due to the downloading of the various TTF fonts from a busy server.
After the ubuntu-restricted-extras package was installed, another test was performed on the other audio files on the USB drive. Hovering the cursor over the files I can now play back mp3, mp4, aac, m4a and ape formatted audio files. This package indeed took care of the most popular audio formats found. By the way, I also found out that the popular Microsoft TrueType fonts (like Times New Roman, Arial, Courier New, etc) were also installed on my system - a big plus and another reason to install this package.
Another audio capability test was then performed - the audio CD playback capability. Inserting an audio CD into the drive resulted in it being recognized and mounted (a icon will appear on the desktop). A message box will also pop-up telling me that I have inserted an audio CD and asked which application to use the CD with - the default is Rhythmbox. Note that I can make this the default action also - however, for this test I accepted the default application by clicking on OK. Rhythmbox, the music management and playback software for GNOME, was launched and I was able to play the CD by clicking on the Play button. The details about the CD (album name, artist, and track/song title) was also displayed. This test confirmed that Ubuntu was indeed capable of handling audio CDs.
Thats it as far as my needs for audio playback on Ubuntu 10.04 goes. In my next blog, I will be describing the video playback capabilities of the OS, so stay tuned.
download file now
Monday, September 25, 2017
Types of installation in Ubuntu 11 04 Natty Narwhal
Types of installation in Ubuntu 11 04 Natty Narwhal
You can use Ubuntu 11.04 (Natty Narwhal) via one of three types of installtion .
1- Installing from windows using Wubi installer
if you are beginner you can use this step because its very simple just get Wubi installer Wubi is Windows software that installs Ubuntu within a series of virtual hard disk files contained in the Windows filesystem. It then configures a boot-time menu so you can choose between booting into Ubuntu or Windows. If you choose to boot into Ubuntu, a clever trick makes the virtual hard disk files appear to be real disks. As a result, the user will be entirely unaware they�re not using a traditional partition-based installation, as described previously.
Using Wubi to install Ubuntu is just like installing some Windows software, and is equally risk-free. There�s even an uninstall option added to Add/Remove Programs. The only drawback is a slight reduction in performance compared to a traditional installation, and you�ll also find the Ubuntu suspend-to-disk (hibernate) power-saving mode doesn�t work.
2-Dual-booting
If you intend to switch to Ubuntu full-time, installing Ubuntu by repartitioning your computer�s hard disk is best. This involves shrinking the existing Windows partition and creating new partitions alongside for Ubuntu. Following this, Ubuntu is installed and a menu added so you can choose between Ubuntu and Windows at boot-time. Having Ubuntu and Windows side-by-side on a PC is called dual-booting.
This sounds complex, but it�s automated via the Ubuntu installation software. However, there�s a slight risk involved when repartitioning, so it�s very wise to backup essential data first.
3-Virtual computer
By downloading a virtual computer application, such as the free-of- charge VMware Player (www.vmware.cornjproductsjpiayer), you can install Ubuntu so it runs within a program window on the Windows desktop.
A virtual computer is effectively a complete computer recreated in software. It offers an excellent way to trial Ubuntu, although the limitations of the virtual computer software mean you won�t experience Ubuntu to its full advantage (desktop visual effects won�t work, for example). Additionally, you�ll need a powerful PC with over lOB of memory for optimal results
download file now
Friday, September 22, 2017
Ubuntu 12 04 LTS Precise Pangolin released to download
Ubuntu 12 04 LTS Precise Pangolin released to download
 |
| 12.04 LTS is in final beta |
 |
| Ubuntu 11.10 at Download page |
Ubuntu 12.04 LTS (Precise Pangolin) just released / published hours ago. But at Ubuntu.com homepage I found that they are still showing 12.04 LTS final beta notice. I visit Download Ubuntu page. Alas! I found 11.10 to download. Remember, Ubuntu officials has not published any notification at their blog or news feed. When they officially announce coming of 12.04, you will get direct link at these pages. But do you really want to download 12.04 now??
Then visit http://releases.ubuntu.com/precise/. You will get latest 12.04 non beta ISO file to download.
Update: It is now official:
Ubuntu 12.04 LTS (Precise Pangolin) Published to download
download file now
ubuntu 15 04 installation problems intel rapl no rapl domains found in package
ubuntu 15 04 installation problems intel rapl no rapl domains found in package
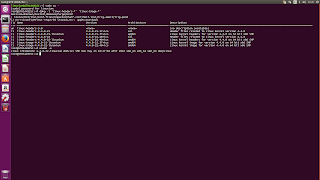
When I install Ubuntu 15.04 on my VirtualBox, an error message pops up and says"intel_rapl:no rapl domains found in package 0alized upgrade biod or use force_addr=0xaddr"

I enable PAE/NX in VirtualBox, and this message dissapears!

Reference:http://askubuntu.com/questions/449574/intel-rapl-no-valid-rapl-domains-message-upon-boot
download file now
Ubuntu 12 04 LTS Desktops Support Extended to Five Years
Ubuntu 12 04 LTS Desktops Support Extended to Five Years
Ubuntu 12.04 LTS, code-named 'Precise Pangolin', the 4th LTS release of Ubuntu, will be supported for 5 years on the desktop as well, where it used to be supported for 3 years on the desktop and 5 years on the server with all the previous LTS releases.
It would bring hardware updates for the first 2 years of support, via regular point releases, thus keeping the product up to date with hardware changes and a further 3 years of support in the form of maintenance updates. Canonical seems to have recognized the increasing demand for Ubuntu desktops in corporate environments where longer maintenance periods are normal. Canonical has also recognized that 70% of the server users are deployed with LTS versions of the product, and as the desktop versions are reportedly similarly popular in businesses, they are now bringing the same extended support on the desktop as well, to keep it in line with the server versions.

Continue Reading �It would bring hardware updates for the first 2 years of support, via regular point releases, thus keeping the product up to date with hardware changes and a further 3 years of support in the form of maintenance updates. Canonical seems to have recognized the increasing demand for Ubuntu desktops in corporate environments where longer maintenance periods are normal. Canonical has also recognized that 70% of the server users are deployed with LTS versions of the product, and as the desktop versions are reportedly similarly popular in businesses, they are now bringing the same extended support on the desktop as well, to keep it in line with the server versions.
download file now
Thursday, September 21, 2017
Ubuntu flavoured 16 04 ISOs for Atom based Intel Compute Sticks
Ubuntu flavoured 16 04 ISOs for Atom based Intel Compute Sticks
Update: This page refers to earlier work and my latest ISOs and kernel upgrade scripts can be downloaded from my latest post.
When Intel released its Ubuntu Compute Stick it was heavily criticized as being under-specd. Also criticized was the choice of Ubuntu with Unity as it was deemed to be too demanding. With this in mind Ive combined the latest patches and source together with Canonicals kernel source to create a range of ISOs that can work on Intels Atom Compute Sticks from the very basic model to the latest. All include audio over HDMI, wifi and bluetooth together with patches that try to reduce the random freezes that have been known to occur.
First up is Lubuntu. Ive configured it to use ZRAM both as an ISO and once installed. As a light-weight Ubuntu it is highly suitable for the minimalist STCK1A8LFC device.

Next is Ubuntu. Previously it was necessary to use the 64-bit bootloader to use my 16.04 ISO. Now Ive configured it to both run and install using either the 32-bit or 64-bit bootloaders. The key benefit is the ability to easily dual-boot without needing to modify the BIOS.

Finally Ive also incorporated all these features and produced Xubuntu, Ubuntu-Mate and Kubuntu ISOs. This provides a choice now of Ubuntu flavours for the Intel Compute Stick.
One potential draw-back is that each ISO includes a patched kernel to provide the missing functionality meaning it will not get any automatic kernel updates from Canonical. So Ive also developed a manual patching process that allows you to download a script which will then update the kernel.
ISOs
To try an ISO download it from one of the links below (i.e. the caption below each image) and write it to a USB using either Rufus in Windows or dd in Linux.Update: If you are using Rufus version 2.3 or above then select Write in DD Image mode when prompted otherwise for version 2.2 and below you should first let Rufus complete and then additionally download bootia32.efi from https://drive.google.com/file/d/0B99O3A0dDe67QWUtek9rdHptMjA and copy the file to the newly created USBs EFIBOOT directory.


Then boot from the USB by pressing the F10 option immediately after powering-on your device. For installation to your device simply run the installer and follow the on-screen instructions.
Remember also to be patient as depending on the speed of your USB it can be anything from 15 to 45 seconds before anything appears on the screen.
 |
| Lubuntu |
 |
| Ubuntu |
 |
| Xubuntu |
 |
| Kubuntu |
 |
| Ubuntu Mate |
Kernel Upgrade Script
If you want to upgrade the kernel to the latest Ubuntu 16.04 (but patched) version first download the upgrade script (click the caption under the image below) , make sure it is executable (use chmod 755 <script>) and then run as root (./<script>). Once the script has finished executing youll need to reboot to use the latest kernel. |
| linuxium-install-xenial-kernel-4.4.0-22-linuxium-ics.sh |
As before this is only for Atom based Intel Compute sticks which includes the STCK1A8LFC, STCK1A32WFC, STK1AW32SC and STK1A32SC models.
Acknowledgements: Pierre-Louis Bossart (HDMI audio), Bastien Nocera (wifi) & Larry Finger (bt).
download file now
Wednesday, September 20, 2017
Ubuntu 12 04 Install MySQL 5 6
Ubuntu 12 04 Install MySQL 5 6
Below is a series of commands you can run to install mysql 5.6 from scratch on your Ubuntu 12.04 machine
sudo apt-get install python-software-properties -y
sudo apt-add-repository ppa:ondrej/mysql-5.6 -y
sudo apt-get update
sudo apt-get install mysql-server -y
sudo apt-add-repository ppa:ondrej/mysql-5.6 -y
sudo apt-get update
sudo apt-get install mysql-server -y
I could not get this to work on small VPS instances, such as the base Digital Ocean instance or an AWS micro instance until I created and mounted a swapfile. This is because these instances do not have enough memory it appears.
download file now
Ubuntu 14 04 LTS verschlüsseln Anleitung der Installation
Ubuntu 14 04 LTS verschlüsseln Anleitung der Installation

Ich empfehle Ubuntu 14.04 LTS Trusty Tahr. Diese Version wird bis April 2019 mit Updates von Ubuntu unterst�tzt. LTS steht f�r �Long Term Support� und bietet langfristige Unterst�tzung.
Diese Anleitung beschreibt die Installation von Ubuntu als einziges Betriebssystem! Verwende diese Anleitung nur wenn du dir ganz sicher bist Windows komplett zu l�schen und Linux als einziges Betriebssystem zu nutzen. Alle Daten und alle Programme die du auf Windows gespeichert und verwendet hast werden gel�scht und sind f�r immer verloren!
Es gibt viele M�glichkeiten Linux w�hrend der Installation einzurichten. Auch gibt es noch andere Wege ein Linux-Betriebssystem zu verschl�sseln. Diese Anleitung ist der einfachste und verst�ndlichste Weg.
Handb�cher
Bevor �berhaupt eine Installation durchgef�hrt wird, empfehle ich besonders Linux-Einsteigern sich ein paar Handb�cher anzusehen.
Sehr zu empfehlen ist auch das Wiki von ubuntuusers.
Windows ist zwar fix von der Platte geputzt und Linux schnell installiert, wenn dann aber etwas nicht gleich funktioniert ist man schnell gefrustet. Um dem vorzubeugen hilft es sich vorher mit der Materie auseinanderzusetzen. Man kann Linux auch erstmal virtuell installieren.
Kurze Eckdaten zur Installation
Version: Ubuntu 14.04 LTS Trusty Tahr
Desktop: Unity
Installationsart: Grafisch
Auslagerungsspeicher/ Swap: Ja
Verschl�sselungsmethode: Gesamte Platte mit verschl�sseltem LVM
Dauer der Installation:
Bis zu mehreren Tagen. Wenn man die gesamte Festplatte w�hrend der Installation mit Zufallszahlen �berschreiben l�sst.
Wird darauf verzichtet, ist die Installation nat�rlich wesentlich schneller abgeschlossen! ;-)
Warum das Betriebssystem komplett verschl�sseln?
Bei einem nicht komplett verschl�sseltem System besteht die Gefahr dass pers�nliche Daten in unverschl�sselten Bereichen gespeichert werden.
Stromversorgung
Solltest du Ubuntu auf einem Laptop, Notebook oder Netbook installieren, solltest du darauf achten dass dieses mit Strom versorgt ist! Wenn dem Akku zwischendurch der Saft ausgeht, wird die Installation dadurch abgebrochen und muss nach einem Neustart von vorne durchgef�hrt werden.
Da diese Installation mehrere Tage dauern kann, ist dies unbedingt zu beachten!
Internetverbindung
Ist w�hrend der Installation keine Pflicht. Allerdings von Vorteil. Bei dieser Anleitung beschreibe ich das Einrichten einer Netzwerkverbindung.
Ubuntu herunterladen
Als Erstes besuchst du die Homepage von ubuntuusers. Hier der direkte Link zum Download von Ubuntu 14.04. LTS:
http://wiki.ubuntuusers.de/Downloads/Trusty_Tahr
W�hle entweder 32-Bit oder 64-Bit aus:
32-Bit: auch i386 oder x86. F�r �ltere Rechner und leistungsschwache Netbooks mit 32-Bit-Prozessoren
64-Bit: auch amd64 oder x86_64. F�r alle aktuelleren PCs, Notebooks und manche Netbooks
Quelle: Siehe Downloadlink ubuntuusers
Ist die richtige Spalte ausgew�hlt klickst du auf Direktlink.

Kurz darauf �ffnet sich ein Fenster. Klicke auf Datei speichern, dann OK und es wird die Datei ubuntu-14.04.1-desktop-i386.iso heruntergeladen.

Heruntergeladene Datei auf DVD brennen
Im Ordner Downloads findest du die Datei (bzw. das ISO-Abbild) ubuntu-14.04.1-desktop-i386.iso. Wenn du ein Brennprogramm hast reicht ein Rechtsklick auf die heruntergeladene Datei, dann auf "�ffnen mit" und es wird dir dein Brennprogramm angezeigt, welches diese Datei brennen kann.
Einfach anklicken. Die Datei wird mit deinem Brennprogramm ge�ffnet. Lege nun eine leere DVD ein und brenne die Datei mit der niedrigsten Geschwindigkeit. Siehe Bild, in diesem Fall hei�t das Brennprogramm CDBurnerXP.

Vor der Installation
W�hrend Windows l�uft, legst du die gebrannte DVD in dein Laufwerk und f�hrst einen Neustart durch.
Wenn automatisch von der DVD gebootet wird, startet Ubuntu von der DVD und du siehst wie bei dieser Anleitung als Erstes den Ubuntu-Installer, siehe erstes Bild der Anleitung. Somit kannst du ganz einfach die Installation durchf�hren.
Sollte aber bei einem Neustart nicht von der DVD gebootet werden und Windows zeigt dir wieder das normale Anmeldefenster, muss im BIOS vorher noch die Boot-Reihenfolge ge�ndert werden! Das DVD-Laufwerk muss im BIOS an erster Stelle stehen, damit die DVD beim Hochfahren geladen wird.
Wie das genau funktioniert, wird hier erkl�rt:
Video: Von CD starten & Bootmen� �ffnen
Die Bootreihenfolge im BIOS einstellen
Installation
Ohren gespitzt und aufgepasst. :-)
DVD liegt im Laufwerk. Computer wird gestartet.
Als Erstes startet der Installer von Ubuntu mit einem Welcome.

Als n�chstes Deutsch ausw�hlen und dann Ubuntu ausprobieren klicken.

Jetzt ist der Ubuntu-Schreibtisch zu sehen. Die Oberfl�che von Ubuntu Namens Unity. Oben rechts ist das Zeichen zu sehen: En = Englisch. Das ist die Tastaturbelegung. Manchmal kommt es vor, dass trotz der Umstellung auf die deutsche Sprache die englische Tastaturbelegung w�hrend der Installation bestehen bleibt. Das f�hrt sp�testens bei der Eingabe der Passw�rter zu Komplikationen!
Es ist sehr wichtig die deutsche Tastaturbelegung einzustellen. Sonst kommt es sp�ter zu der Fehlermeldung dass das Passwort falsch sei. Zu diesem Problem habe ich bereits einen Artikel geschrieben: Problem mit Passwort nach verschl�sseltem LVM - cryptsetup failed, bad passwort or options?
Um die Tastaturbelegung zu �ndern, einfach unten links auf das Zahnrad-Icon klicken. Danach �ffnet sich das Fenster f�r die Systemeinstellungen.

W�hle Texteingabe.

Bis jetzt ist dort nur English (USA) zu sehen. Unten links auf das + Zeichen klicken, um die deutsche Tastaturbelegung hinzuzuf�gen.

Einfach deutsch eingeben, ausw�hlen und dann auf Hinzuf�gen.

Deutsch wird nun mit aufgelistet. Jetzt die englische Tastaturbelegung l�schen. English (USA) ausw�hlen und markieren. Danach unten auf das - Zeichen klicken.

Die �nderung f�r die Tastaturbelegung war erfolgreich. Oben rechts wird nun De = Deutsch angezeigt.

Jetzt wird die Verbindung zum Internet hergestellt. So werden Aktualisierungen w�hrend der Installation heruntergeladen. Klicke oben rechts die zwei Pfeile.


Um eine neue Netzwerkverbindung einzurichten gehe auf Hinzuf�gen.

Es �ffnet sich folgendes Fenster. Klicke auf das Feld wo Ethernet steht.

W�hle den Verbindungstyp aus. Bei den meisten wird es wohl ein Funknetzwerk sein. Ich selbst nutze Kabel.

Ich zeige die Einstellungen mit DSL. Mit Funknetzwerk ist das genauso einfach. :-)

Oben steht der Verbindungsname. Standardm��ig steht dort DSL-Verbindung 1. Es kann auch unbenannt werden. Bei diesem Beispiel belasse ich es dabei. Nun in den entsprechenden Feldern die richtigen Angaben eintragen. Bevor du auf Speichern klickst, sehe dir das n�chste Bild an.

Wechsel von dem Reiter DSL zu Allgemein. Dort kann bei Bedarf eingestellt werden dass das Netzwerk sich automatisch verbindet, wenn es verf�gbar ist. Einfach das H�kchen setzen und unten Speichern.

Die eingerichtete Netzwerkverbindung wird angezeigt. Schlie�en.

Jetzt wieder oben rechts auf die Pfeile und dann die eingerichtete Netzwerkverbindung w�hlen. In meinem Fall DSL-Verbindung 1.

Bevor die Verbindung aktiviert wird steht immer vorher Verbindung getrennt - Sie sind nun offline. Warte einfach einen Moment.

Gleich danach wird Verbunden eingeblendet.

Die vorhin eingerichtete Netzwerkverbindung steht jetzt an erster Stelle.

Deutsche Tastaturbelegung ist eingestellt. Internetverbindung steht. Doppelklick auf Ubuntu installieren und los gehts..

Deutsch w�hlen. Weiter.

Nutzt du ein Laptop oder Notebook, steht unter dem Punkt F�r eine optimale Installation sollten Sie sicherstellen, dass Ihr Rechner mit Strom versorgt ist. Das ist sehr wichtig! Wie oben unter dem Punkt Stromversorgung bereits erw�hnt. Im optimalen Fall sind oben alle H�kchen gr�n.
Setze bei Aktualisierungen w�hrend der Installation herunterladen und bei Software von Drittanbietern installieren jeweils das H�kchen. Wie auf dem Bild zu sehen. Weiter.

Festplatte l�schen und Ubuntu installieren ist bereits markiert. Um Ubuntu zu verschl�sseln, m�ssen zwei H�kchen gesetzt werden: Bei Encrypt the new Ubuntu installation for security und Use LVM with the new Ubuntu installation. Erst danach Jetzt installieren.

Vor dem n�chsten Schritt lies dir bitte das Sicherheits 1x1 von ubuntuusers durch!
Ich empfehle dir f�r deinen Computer und zum Verschl�sseln ein anderes Passwort zu nutzen, als z.B. f�r deinen Email-Account oder wo du dich sonst im Internet anmeldest. Das mag zwar etwas Ged�chtnistraining sein, erh�ht aber die Sicherheit. Du wirst dich schnell daran gew�hnen ein l�ngeres Passwort einzugeben.
"Eine gute Passphrase enth�lt eine Mischung aus Buchstaben, Zahlen und Satzzeichen. Passphrasen sollten empfohlenerweise eine L�nge von 20 oder mehr Zeichen haben!"
Gib dein sicheres Passwort ein!
Nach der Eingabe des Sicherheitsschl�ssels kann unten f�r mehr Sicherheit der freie Speicherplatz �berschrieben werden. Es ist deine Entscheidung ob du dort das H�kchen setzt oder nicht! Allerdings kann der L�schvorgang, je nach Gr��e deiner Festplatte, bis zu mehren Tagen dauern!
ubuntuusers: "Es ist aus Sicherheitsgr�nden empfehlenswert, die Partition ein Mal mit Zufallszahlen zu �berschreiben, vor allen Dingen, wenn auf dieser vorher unverschl�sselte Daten gespeichert waren. Ansonsten sind unter Umst�nden viele Dateien nach dem Verschl�sseln noch auslesbar."
Wenn du alles eingegeben hast gehts weiter mit Jetzt installieren.

Wo befinden Sie sich? Berlin? Willkommen in der Hauptstadt. :D Zeitzone passt. Weiter.

Tastaturbelegung ist zwar schon alles eingestellt, trotzdem nochmal Deutsch w�hlen. Weiter.

Bei Ihr Name kannst du hinschreiben was du m�chtest. Name des Rechnes und Benutzername werden automatisch vervollst�ndigt. Mein Name und Benutzername lasse ich immer gleich. Name des Rechners kann aber auch ge�ndert werden. Es ist egal was dort steht. Ich habe mich f�r linux entschieden.
W�hle auf jeden Fall ein anderes Passwort als das welches du vorhin benutzt hast um dein System zu verschl�sseln!
Darunter Passwort zum Anmelden abfragen markiert lassen.
Desweiteren besteht die M�glichkeit unten bei Meine pers�nlichen Dateien verschl�sseln ein H�kchen zu setzen. Theoretisch muss das nicht sein, denn mit dieser Installation ist das System bereits komplett verschl�sselt! Deine Dateien sind trotzdem vor physischem Zugriff auf deine Festplatte gesch�tzt, auch wenn du es dort nicht anhakst. Ich mache es trotzdem. Doppelt h�lt besser, oder? :D
Wenn alles ausgef�llt und angehakt ist: Weiter.

Jetzt kannst du dir eine Pause g�nnen. Der Installer erledigt den Rest und richtet automatisch das System ein. Ganz unten ist ein Balken zu sehen. Der zeigt dir den Fortschritt der Installation an.

Wer ganz neugierig ist und wissen will ob es vielleicht doch noch was zu sehen gibt, der kann sich die folgenden Informationen ansehen. Hier wird kurz das Software-Center vorgestellt.

Hier ein Blick auf die Musik.

Fotos mit dem Programm Shotwell verwalten. Gimp kann nachinstalliert werden.

Firefox ist bereits mit dabei und ist nach der Installation sofort einsatzbereit.

Zum Schreiben, f�r Tabellen oder Pr�sentationen ist LibreOffice mit an Board.

Nach der Installation gibt es ein paar Anpassungsm�glichkeiten.

Ich empfehle ubuntuusers.de. Das beste Linux-Wiki und ein wunderbares Forum. Es lebe die Community!

Installation ist abgeschlossen. Jetzt neu starten.

Jetzt die Passphrase eingeben. Das lange Passwort das du w�hrend der Installation als Erstes unter dem Punkt W�hlen Sie einen Sicherheitsschl�ssel eingetragen hast.

Wenn die Meldung auftaucht cryptsetup failed, bad passwort or options? dann hast du dich hoffentlich nur vertippt. Probiere es nochmal. Mit meiner Anleitung wird es auf keinen Fall an der Tastaturbelegung liegen, wie hier beschrieben: Problem mit Passwort nach verschl�sseltem LVM - cryptsetup failed, bad passwort or options?

cryptsetup: sda5_crypt set up successfully. Geht doch. ;-) Richtige Passphrase eingegeben. Danach wird der Anmelde-Bildschirm angezeigt.

Jetzt gibst du das Passwort ein, welches du bei Wer sind Sie? eingegeben hast.

Dein System ist erfolgreich installiert.
Herzlichst
Emanuel
Unterst�tze meinen Blog mit einer Spende.
� � � � � � � � � � � � � � � � � � � � � � � �
Das k�nnte dich auch interessieren:
? Debian - Gesamte Platte mit verschl�sseltem LVM - Anleitung der Installation
? Debian verschl�sseln - Anleitung der Installation - Wheezy mit XFCE
? TrueCrypt - Anleitung der Installation f�r Ubuntu
? �berwachung - Big Brother is watching you
? Emails verschl�sseln - Anleitung
� � � � � � � � � � � � � � � � � � � � � � � �
download file now
Subscribe to:
Posts (Atom)