Wednesday, August 30, 2017
Tutorial Install Grub Customizer in Ubuntu 13 10
Tutorial Install Grub Customizer in Ubuntu 13 10
Grub Customizer is a tools to configure the Grub Menu settings and menu entries. This tools base on graphical interface, so easy to use. So we do not need to make changes grub with syntax. This tools allows to move, remove, rename and edit the bootloader menu entries, set the default operating system, reinstallation of the bootloader to MBR, and etc.
What are the feature of Grub Customizer application? We can give background on the bootloader menu, we can change foreground color of menu list, and etc.
So how to install grub customizer in Ubuntu (this case I use ubuntu 13.10 Saucy Salamander)?
- Open terminal by press Ctrl+Alt+T
- Then switch to superuser / root user using command: sudo su then type your system password.
- Then add the PPA repository by using this command:
- Then update package lists and install grub-customizer:
apt-get update; apt-get install grub-customizer
- Grub customizer has been installed. Open it from Unity Dash and enjoy it!

add-apt-repository ppa:danielrichter2007/grub-customizer
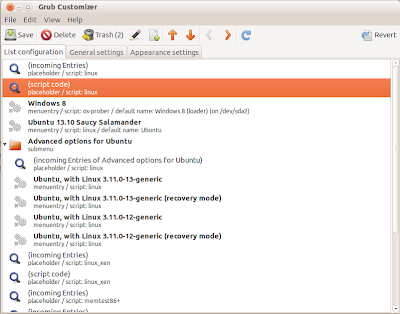
This screenshot of Grub Customizer:

download file now