Wednesday, August 30, 2017
Ubuntu and Fonts
Ubuntu and Fonts
In this short tutorial i discuss some handy fonts related tips that could improve users desktop experience . The tips
1. Installing Liberation Fonts
RedHat sometimes back released a collection of really cool fonts as part of Liberation fonts package . This opensource font set includes a Sans, Serif and Mono set .
Here is how the liberation fonts look :
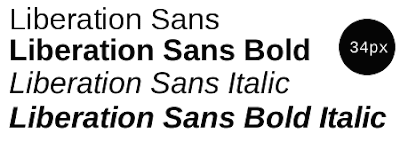
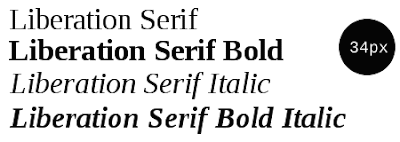
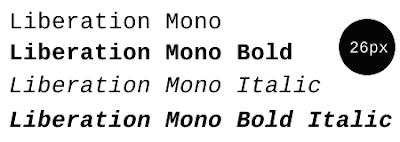
To install this font issue the following commands in the terminal window (Applications -> Accessories -> Terminal)
after completing above step issue the following command to install the font :
Liberation font package should be installed properly .
2. installing Microsoft fonts package
Even if you hate Microsoft Windows still majority of desktop computers around the world run some or other variant of Windows . Now sharing documents , web pages across Linux and Windows is bit difficult as document created in Windows do not render properly/or look as they did in Windows because the fonts which were present in windows are not available in Linux . Now even though Microsoft has released these fonts freely but still because of licensing issue most of the Linux distributions do not ship these fonts by default and you have to install them separately.
Here below we discuss how to install the following Microsoft fonts on your Ubuntu Desktop :
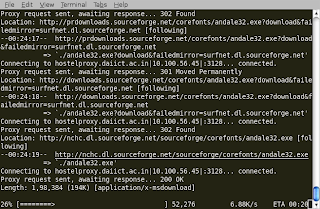
 After clicking the Ok button , you will find the following screen showing the fonts are being downloaded .
 After this process is over issue the following command in the terminal window :
3. Improving clarity of fonts on LCD/Laptop Displays
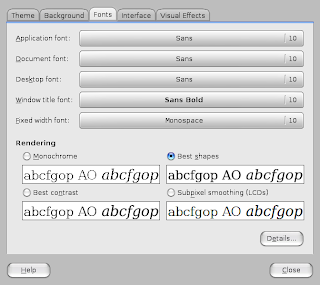
Ubuntu does not enable Subpixel smoothing by default which improves the clarity of fonts on LCD displays . To enable it go to (System -> Preference -> Appearance ) and click on the Fonts tab
You will find a window like the one shown below , chose "Subpixel smoothing(LCD)" and close the window you should be able to see the change immediately .
 Dialog Box With Subpixel smoothing Enabled

4. Installing some cool fonts
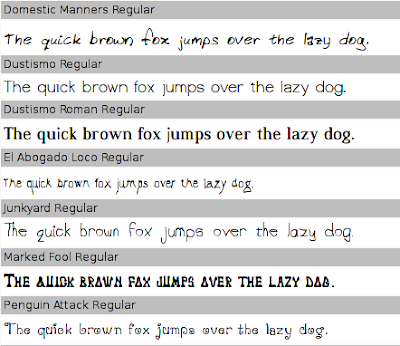
A number of good looking fonts are provided as GPL package , these fonts created by Dustin Norlander (http://dustismo.com) are available in repositories too .
Here is the package information abt this font :
and this is how the font looks:
 To install these font issue the following command in the terminal window :
These fonts are provided by a independent font developer named George Williams and are available in Ubuntu Repositories .
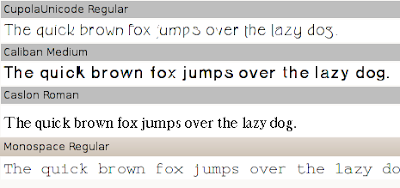 This how George Williams Font look
To install these fonts issue the following command in the terminal window :
 To install this font issue the following command in the terminal window :
5.Installing any custom ttf font in Ubuntu
[ Not the following steps would add the font system-wide ]
Suppose you have myfnt1.ttf and myfnt2.ttf and you want to install this font for all the users . You can do so by following these steps :
First we create a directory where our custom fonts would rest :
Now we copy these fonts in this custom directory :
and finally we update the fonts with the following command :
Article written by Ambuj Varshney , blogambuj(at)gmail.com
For Linux on Desktop Blog ,(C) 2008 Ambuj Varshney
echo "deb http://ppa.launchpad.net/corenominal/ubuntu gutsy main" | sudo tee -a /etc/apt/sources.list
and
echo "deb-src http://ppa.launchpad.net/corenominal/ubuntu gutsy main" | sudo tee -a /etc/apt/sources.list
and
sudo apt-get update
after completing above step issue the following command to install the font :
sudo apt-get install ttf-liberation
2. installing Microsoft fonts package
Even if you hate Microsoft Windows still majority of desktop computers around the world run some or other variant of Windows . Now sharing documents , web pages across Linux and Windows is bit difficult as document created in Windows do not render properly/or look as they did in Windows because the fonts which were present in windows are not available in Linux . Now even though Microsoft has released these fonts freely but still because of licensing issue most of the Linux distributions do not ship these fonts by default and you have to install them separately.
Here below we discuss how to install the following Microsoft fonts on your Ubuntu Desktop :
- Andale Mono
- Arial Black
- Arial (Bold, Italic, Bold Italic)
- Comic Sans MS (Bold)
- Courier New (Bold, Italic, Bold Italic)
- Georgia (Bold, Italic, Bold Italic)
- Impact
- Times New Roman (Bold, Italic, Bold Italic)
- Trebuchet (Bold, Italic, Bold Italic)
- Verdana (Bold, Italic, Bold Italic)
- Webdings
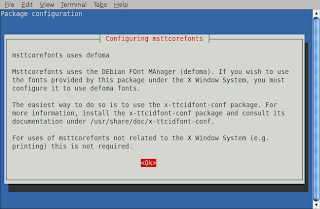
sudo apt-get install msttcorefontsAfter issuing the above command , apt-get will download few files and then you will be greeted with the following screen :
 After clicking the Ok button , you will find the following screen showing the fonts are being downloaded .
 After this process is over issue the following command in the terminal window :
sudo fc-cacheif the above steps worked without any problem the font should be installed properly on your system .
3. Improving clarity of fonts on LCD/Laptop Displays
Ubuntu does not enable Subpixel smoothing by default which improves the clarity of fonts on LCD displays . To enable it go to (System -> Preference -> Appearance ) and click on the Fonts tab
You will find a window like the one shown below , chose "Subpixel smoothing(LCD)" and close the window you should be able to see the change immediately .
 Dialog Box With Subpixel smoothing Enabled

Same Dialog Boxes one with Subpixel smoothing enabled and one with Best shapes enabled
4. Installing some cool fonts
A number of good looking fonts are provided as GPL package , these fonts created by Dustin Norlander (http://dustismo.com) are available in repositories too .
Here is the package information abt this font :
This package contains various fonts from dustismo.com licensed under the GPL.
Dustismo and Dustismo Roman are general purpose Sans Serif and Roman TrueType
fonts (with bold, italic and bold-italic variations), and contain all the
European Latin characters.
The other fonts are beautiful for special decorations and headlines, but they
are limited to subsets of ASCII...
and this is how the font looks:
 To install these font issue the following command in the terminal window :
sudo apt-get install ttf-dustinGeorge Williams Font :
These fonts are provided by a independent font developer named George Williams and are available in Ubuntu Repositories .
 This how George Williams Font look
To install these fonts issue the following command in the terminal window :
sudo apt-get install ttf-georgewilliamsA couple of Handwriting fonts
 To install this font issue the following command in the terminal window :
sudo apt-get install ttf-sjfonts
5.Installing any custom ttf font in Ubuntu
[ Not the following steps would add the font system-wide ]
Suppose you have myfnt1.ttf and myfnt2.ttf and you want to install this font for all the users . You can do so by following these steps :
First we create a directory where our custom fonts would rest :
sudo mkdir /usr/share/fonts/truetype/mfnt
Now we copy these fonts in this custom directory :
sudo cp myfnt1.ttf myfnt2.ttf /usr/share/fonts/truetype/mfnt
and finally we update the fonts with the following command :
sudo fc-cache -f -vif you want more fonts you might like to look at this page it lists a number of freely available fonts which you could install by following the above procedure .
Article written by Ambuj Varshney , blogambuj(at)gmail.com
For Linux on Desktop Blog ,(C) 2008 Ambuj Varshney
download file now