Friday, September 29, 2017
Tutorial 2 ELM Images File Selector and Popups
Tutorial 2 ELM Images File Selector and Popups
This is the second post in my series on developing GUI applications in Elementary using Python. Today we are going to continue building on the Hello Elementary example I started in the first tutorial. In todays post I will only be covering the code that is different from our previous examples, so if you havent looked that one over yet please take a moment to do so now.
You can find the full source code for all of todays examples here.
Example 3:
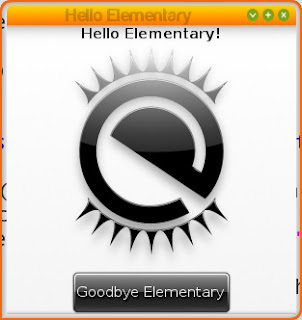
We are going to start off by displaying a static, pre-defined image in our GUI:

It only takes us 8 lines of actual code to create and display the above image in our program:
 #Creates an Image object that displays an image
 ic = elementary.Image(window)

 #Use the os module to get the current path to our .py file. Our image is relative to our .py We do this because it is best to use the absolute file path to images for the best results.
 location = os.path.dirname(os.path.abspath(__file__))

 #Tell our icon to auto-fill open space
 ic.size_hint_weight_set(evas.EVAS_HINT_EXPAND, evas.EVAS_HINT_EXPAND)
 ic.size_hint_align_set(evas.EVAS_HINT_FILL, evas.EVAS_HINT_FILL)

 #Here we set the image we want our icon to display
 ic.file_set("%s/images/logo.png"%location)

 #Optional, lets add mouse over text to our image
 ic.tooltip_text_set("Look a pretty picture!")

 #Lets show our icon
 ic.show()

 box.pack_end(windytax)
 #Pack our icon between our text and button
 box.pack_end(ic)
 box.pack_end(button)
In this example we utilize the elementary Image object to display our selected .png file.
Example 4:
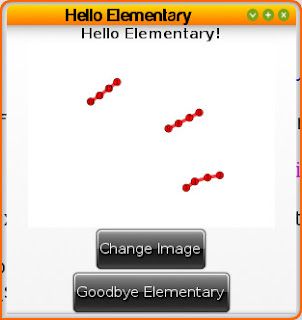
Very rarely do we want to simply display a single image for as long as our program is running. So lets give the user the ability to change the image we display in our program:

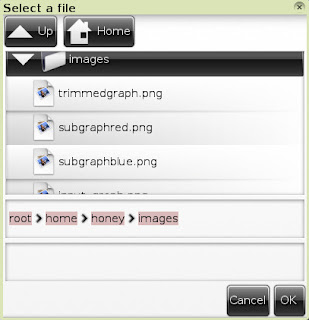
Elementary has a built in FileselectorButton object that when clicked presents our user with a nice file selector GUI:

The new code to add this file selector button looks like:
 #Creates a "FileselectorButton" object. This is a button (just like we have created before) except that when it is click it automatically opens a file selector window
 fsb = elementary.FileselectorButton(window)

 #We can set the text of our fsb just like a normal button text
 fsb.text = "Change Image"

 #Tooltip for mouse over
 fsb.tooltip_text_set("Click Me!")

 #This tells our file selector window what to do when our user selects a file. The first argument is the callback function we want run and our second argument is our image object we want to change the display of
 fsb.callback_file_chosen_add(change_image, ic)

 #Show our button
 fsb.show()

 box.pack_end(windytax)
 box.pack_end(ic)
 #Pack our file selector button between our image and button
 box.pack_end(fsb)
 box.pack_end(button)

 window.resize_object_add(box)

 window.resize(300,300)

 window.show()

#Our fileselector callback. The file argument is the fileselectbutton object. The second argument is the full path to the file that was selected. The final argument is the image object we passed to this callback
def change_image(fsb, file_selected, image):
 #Check to make sure a file of some sort was selected. If nothing was selected file_selected will equal None type
 if file_selected:
 #These are the extensions we will allow our program to display
 validExtensions = [".png", ".jpg", ".gif"]

 #Use the os module to easily get the extension of our file
 fileName, fileExtension = os.path.splitext(file_selected)

 #If the extension is in our validExtenions lets check the image we are displaying!
 if fileExtension in validExtensions:
 image.file_set(file_selected)
Example 5:
Lets add one finishing touch to our application. If our user selects a file to display that doesnt have a valid image extension lets send them a popup telling them why the image displayed wasnt changed:

Showing a popup of this nature is fairly easy using elementarys Popup object. So the final edit to our code looks like this:
#This time we also pass the window object to our change image function. The reason for this is that our popup object needs a parent window object
def change_image(fsb, file_selected, image, window):
 if file_selected:
 validExtensions = [".png", ".jpg", ".gif"]

 fileName, fileExtension = os.path.splitext(file_selected)

 if fileExtension in validExtensions:
 image.file_set(file_selected)
 else:
 #if we have an invalid extension lets give the user a popup message telling them why the image didnt change

 #Create a popup message
 popup = elementary.Popup(window)

 #Set the title of our popup
 popup.part_text_set("title,text", "Invalid File Extension")

 #Set the text of our popup
 popup.text = "File %s has an invalid file extension of %s"%(fileName, fileExtension)

 #Create a button object
 bt = elementary.Button(window)

 #Set its text
 bt.text = "OK"

 #Define a callback that is called when the button is clicked, lets pass our popup object to this call back so we can close the popup when the user presses OK
 bt.callback_clicked_add(bnt_close, popup)

 #Sets content for our popup. The first argument is an arbitrary name for the content piece and the second argument is the elementary object you would like displayed for the content
 popup.part_content_set("button1", bt)

 #Show the popup to our user
 popup.show()

#The callback for our popups OK button. The first agurment is the button object itself and the second object is the popup we passed to it
def bnt_close(bt, popup):
 #Lets delete the popup so it goes away
 popup.delete()
Hope everyone learned something today! Have any questions feel free to drop a comment below or start a discussion on our user boards.
Resources for this Lesson:
- Displaying Images
- Image
- FileselectorButton
- Popup
~Jeff Hoogland
download file now