Showing posts with label via. Show all posts
Showing posts with label via. Show all posts
Thursday, September 28, 2017
Trik Internet Gratis Telkomsel Terbaru April 2012 Via Pc
Trik Internet Gratis Telkomsel Terbaru April 2012 Via Pc

Download Tutorial Video Trik Internet Gratis Telkomsel
Download Software dan Config Trik Internet Gratis Telkomsel
Jika tutorial diatas sudah tidak bisa digunakan lagi, sobat bisa menggunakan trik Opera Mini Handler berikut ini:
Seting HP :
- Apn: Telkomsel
- Proxy: 141.0.11.31
- Port: 80
- Setting Opera Mini Handler :
http://m.skype.com/sitecheck.opera.com:80
socket://m.skype.com/sitecheck.opera.com:1080
Proxy type: Host
Proxy server: m.skype.com / login.yahoo.com
(Yang lain biarkan saja)
Untuk Opera Mini Handler, bisa sobat Download di SINI. Sekian Trik Internet Gratis Telkomsel Terbaru April 2012, semoga berhasil.
Source
download file now
Thursday, September 21, 2017
Ubuntu Tip Connecting To GoPro Hero4 Silver via WiFi
Ubuntu Tip Connecting To GoPro Hero4 Silver via WiFi
Any body who owns a GoPro camera will likely know you can connect to it using the GoPro app on your tablet. You will also know that GoPro has some handy video editing software that they will give you for free. All you have to do to get it is head over to their website and download it. Unless youre a Linux user. Its Mac and Windows only.
The tablet app is Android compatible. However it would not let me download files to an SD card. It seems to want to use the tablets own internal storage. And since the videos are quite large. This can be problematic.
Now youd think the easy way around this would be connecting the camera to a desktop PC and using the USB port or simply removing the SD card. Neither of these options were working out for me. USB connectivity was spotty and irritating. Sometimes the camera would show me the files. And then nothing would happen when I tried to copy them or my PC would freeze.
Im not really sure what the issue is. But GoPro Hero4 and USB transfers are just not an option on my PC.
I had similar issues with the 64GB SD card. Which actually wasnt even recognised by Ubuntu at all. Its likely my little USB adapter just cant handle it. Whatever the problem was. Ubuntu just didnt see the card at all and so couldnt mount it.
I thought I had made a horrific error in buying GoPros. I use them while commuting to work on my bicycle. So I started looking for a solution. And found a link which described how to stream live video from a GoPro using VLC. The tutorial was for the Mac. But all it needed was a WiFi connection to the GoPro camera, a web browser and VLC. Nothing Mac specific then.
So I figured if I can stream live video. Maybe I can transfer pre-recorded videos. And I was right.
Step 1: Enable the WiFi on your GoPro using the GoPro app option and NOT the RC.
Step 2: Connect to the GoPros WiFi network as you would with any other network. It will be named whatever you named the camera when you connected to the Android app. If you havent done this yet. Do it now.
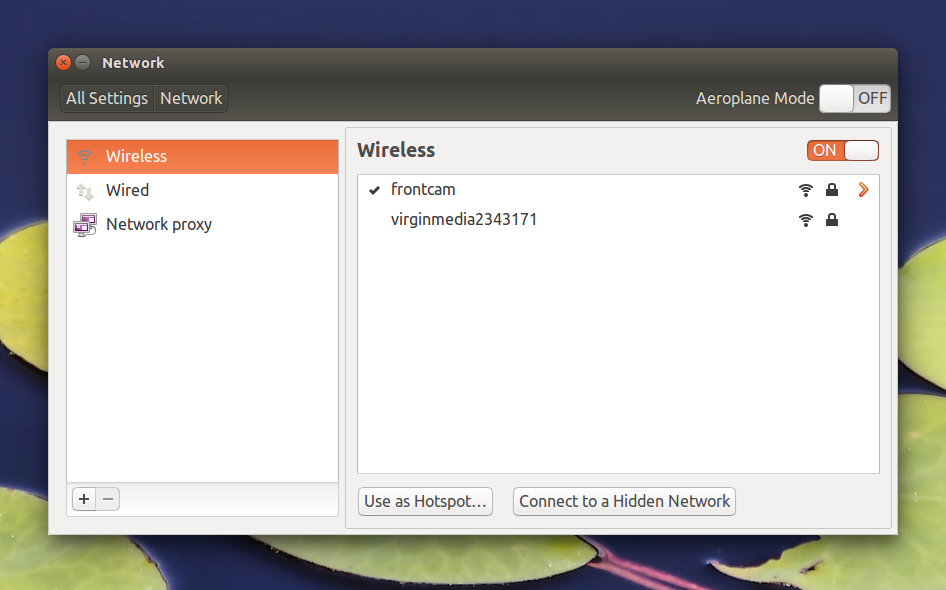
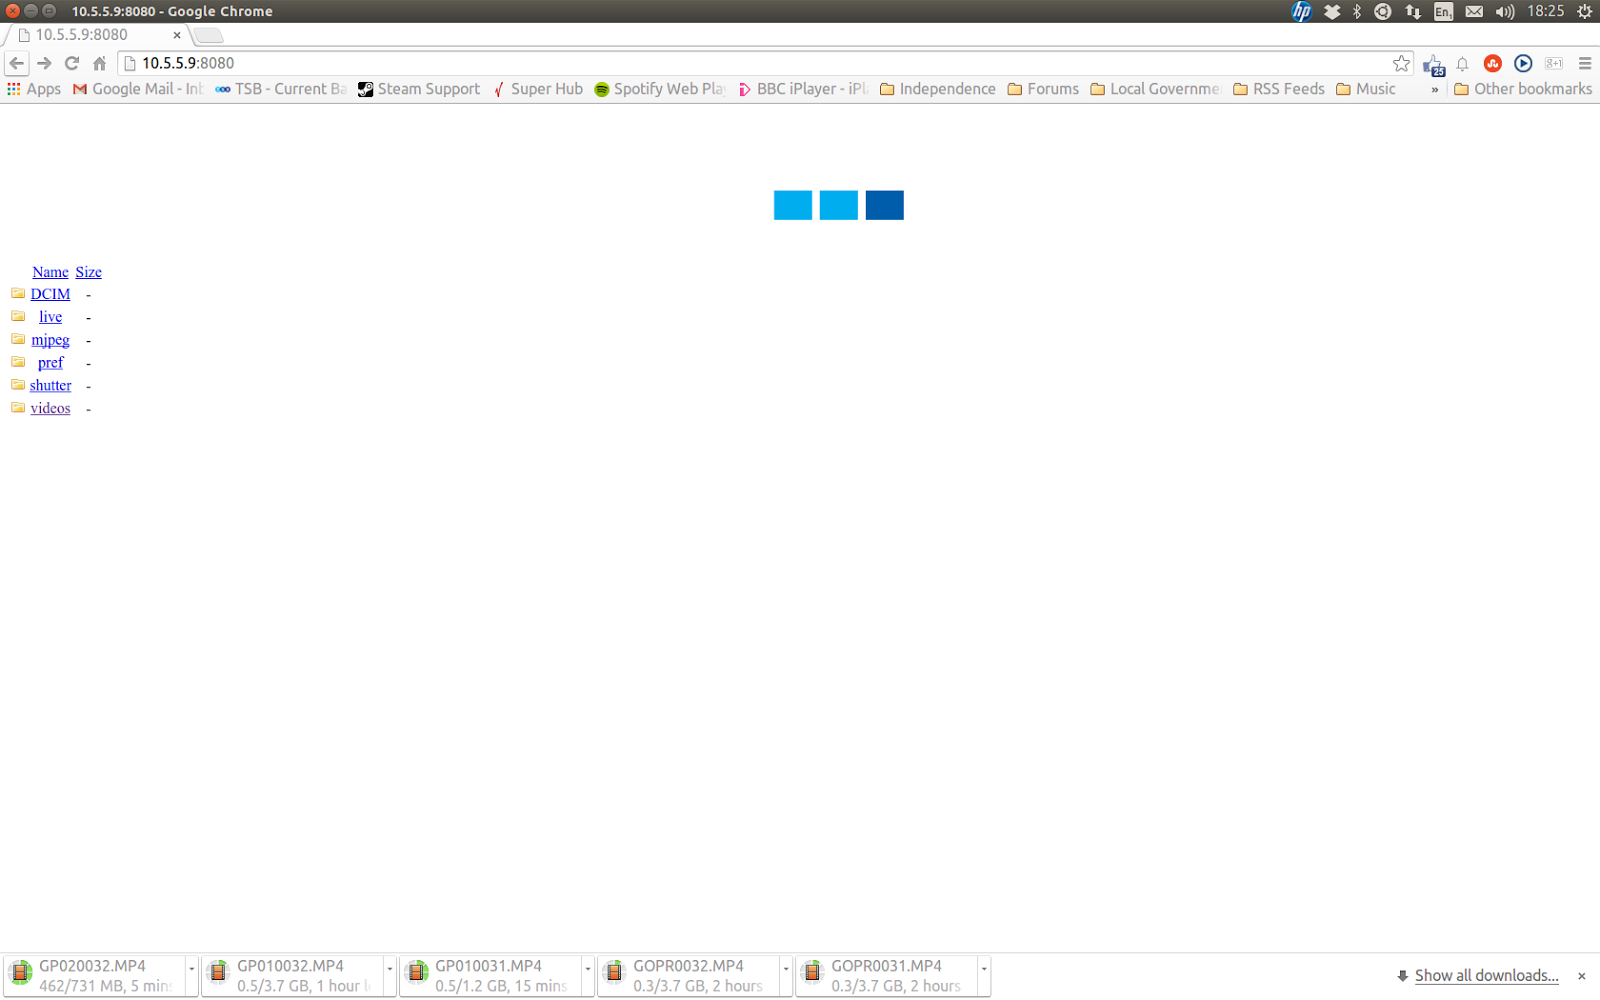
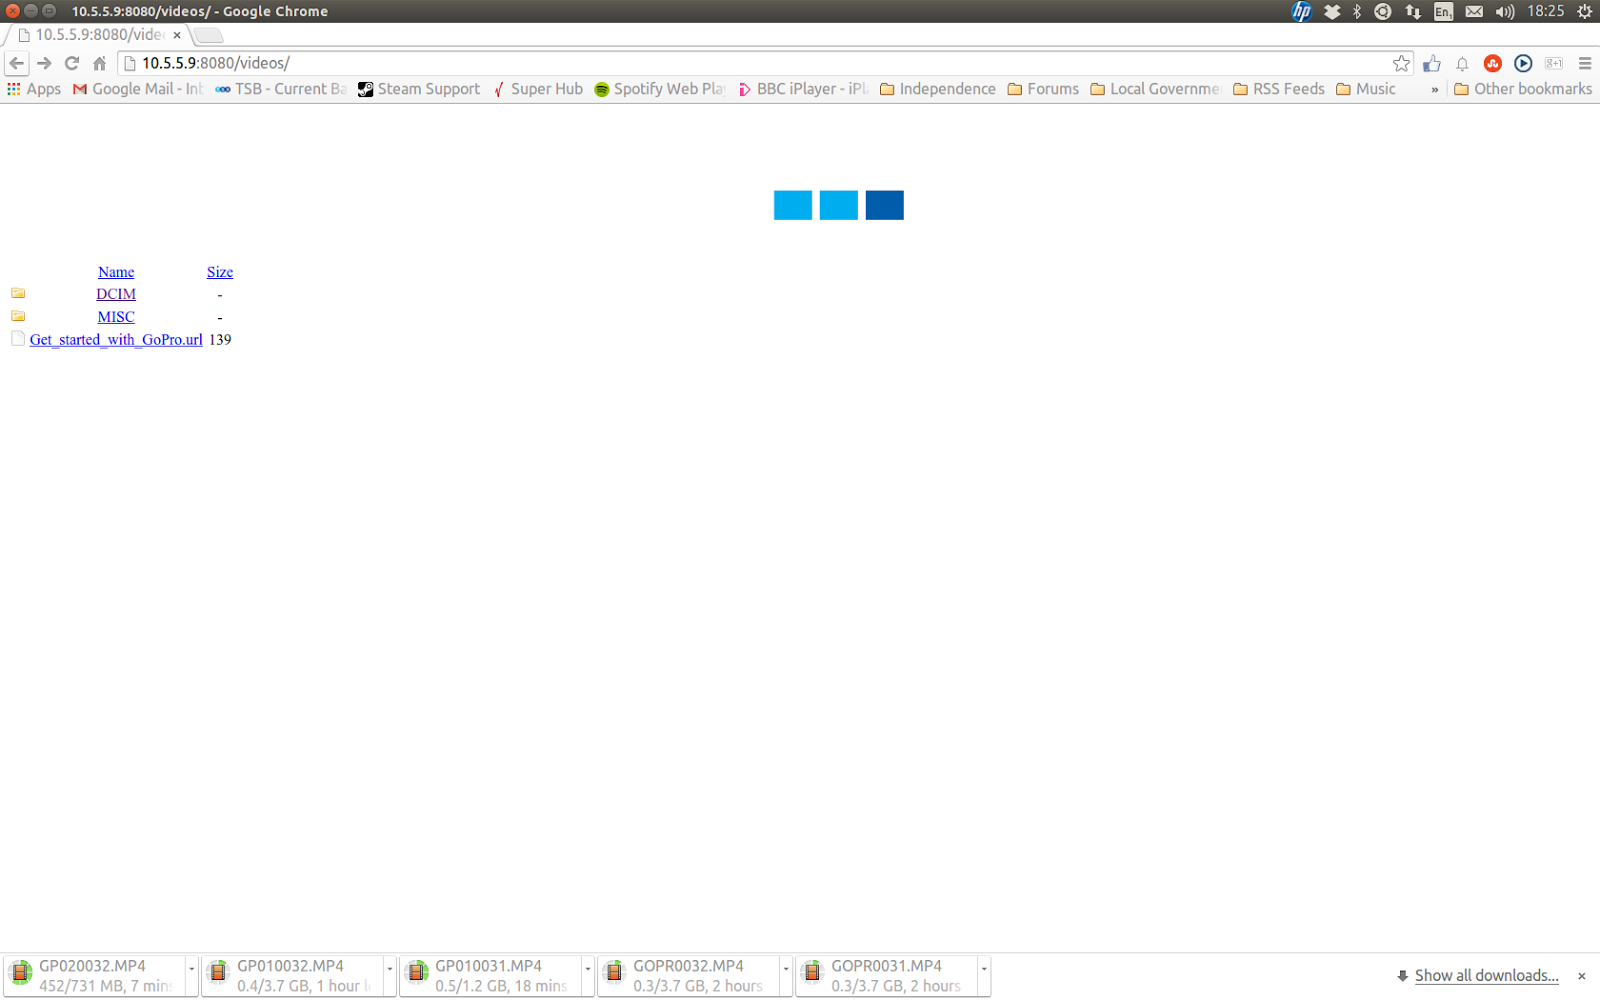
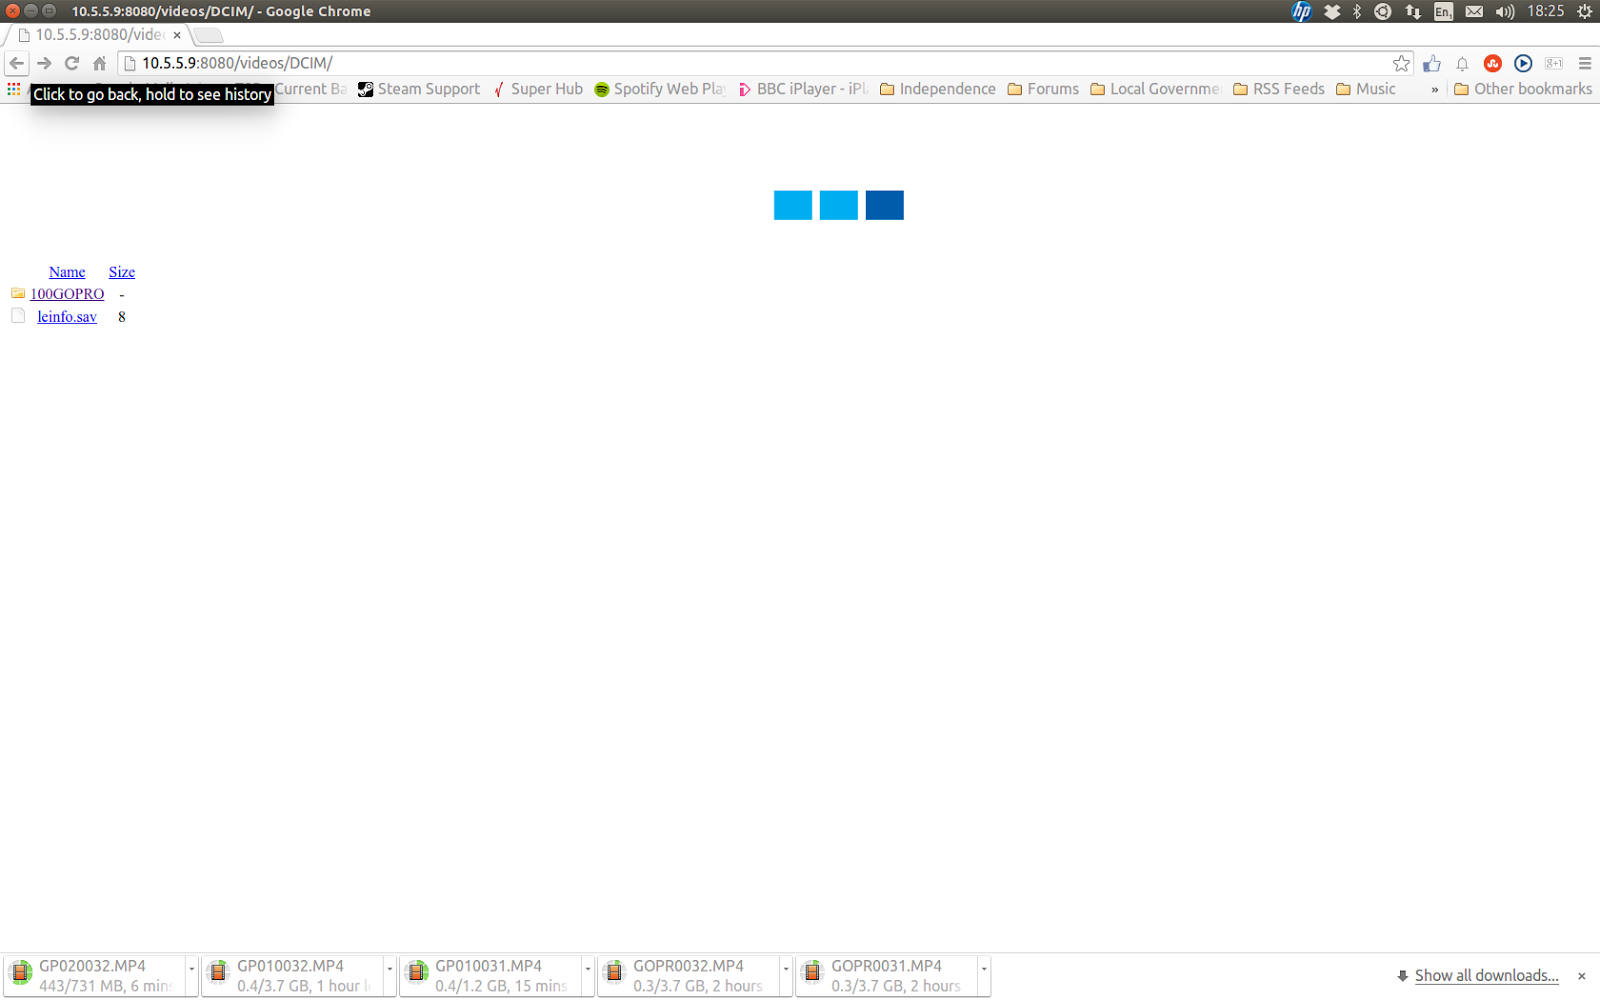
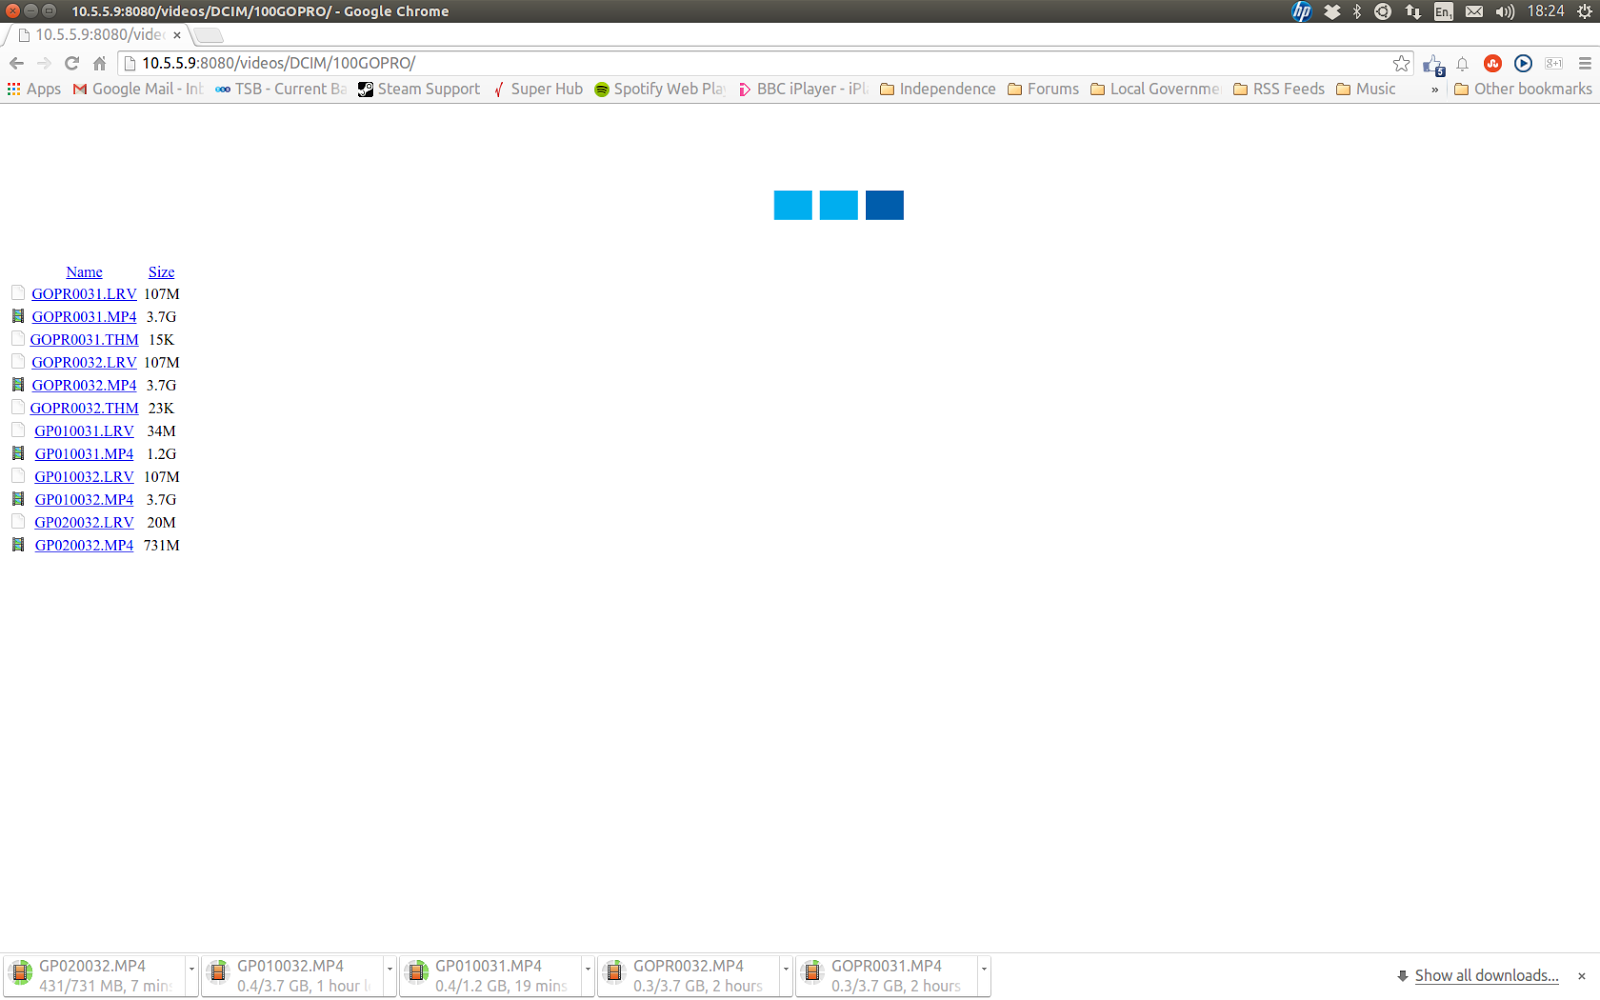
Step 4: Click on the video file you want to download as you normally would with any other file.
And thats all there is to it.
EDIT - 07/07/2015: Some folk might prefer this method.
download file now
Thursday, September 7, 2017
TUTORIAL FLASH VIA TWRP STOCKROOM ROOTED ANDROMAX Qi G36C1G
TUTORIAL FLASH VIA TWRP STOCKROOM ROOTED ANDROMAX Qi G36C1G

ini adalah stockroom dari Bacup Andromax Qi Original . bisa jadi solusi buat temen temen yang nglamin Bootlop atau mungkin dari temen temen yang bOsen dengan Custom Room dan ingin kembali Pindah ke Stockroom Original Andromax Qi .
Dan sesuai Judul Artikel ada beberapa kelebihan Stockroom yang akan saya share kali ini salh satunya Stockroom ini sudah dalam keadaan Root Permanent .saya akan paparkan Sedikit dari Stockroom Andromax Qi G36C1G
STOCKROOM ANDROMAX Qi G36C1G
- Rooted Permanent
- Boot Img Anti Lag update Terbaru
- Aplikasi Bawaan Hp Terhapus
- Dll
- ANDROMAX Qi G36C1G
- Terpasang TWRP
- Cermat Dan Teliti
TUTORIAL
- DOWNLOAD BACKUP STOCKROOM ANDROMAX Qi pada link bawah artikel
- Backup ROM anda Terlebih dahulu .sampai ada Folder TWRP pada Micro SD ( ini penting karena Folder2 di bacupan tadi yang akan kita gunakan untuk menaruh file stockroom yang Kalian Download)
- Cara Bacup Room ---Masuk TWRP>pastikan yang aktif di TWRP adalah Micro Sd Bukan Internal/memory Telepone > BACKUP > CENTANG SEPERLUNYA biar tidak lama centang Yang no 1 dan 2 Aja atau yang paling atas yang terpenting kita dapatkan Foldernya untuk esekusi Stockroom > FINIS > REBOOT ---
- dan lihat apakah sudah ada Folder TWRP Di dalam Micro SD kalau hh kalian Bootlopp bisa di cek mengunakan HH lain ataupun Pc/Laptop kalau yang sukses Nanti kira kira Foldernya seperti Ini Tapi setiap HH berbeda beda ini hanyya sebagai contoh jangan dijadikan Patokan TWRP - BACKUPS - e92b88c2-2016-03 - 17 - 04 -19-05_LRX2G_release-keys-( ISI FILE BACKUP ) lihat pada gambar

- jadi setiap HH berbeda beda ini harus di lakukan dengan hh yang mau di instal Stockroom agar nantinya file bacup bisa di baca oleh hh kita kalau kita ingin melakukan Restore
- Tahapan Restoring Esktrack File Stockroom yang anda Download Tadi
- Ambil Isi File dari Folder yang anda Estrack tadi ,kalau tidak salah ada 9 File,Pindahkan File ke Foder Backup punya kalian yang tadi di buat kalau ada file didalam folder terakhir di hapus dulu dan Paste File tadi Taruh di Folder yang Paling Terakhir
- Cohtoh TWRP - BACKUPS - e92b88c2-2016-03 - 17 - 04 -19-05_LRX2G_release-keys-(paste disini )
- lanjut untuk Flash Stockroom
- Matikan HH, Masuk Ke TWRP
- Wipe Data
- Wipe Sistem
- Pastikan TWRP membaca eksternal Sd/Micro SD
- Restore
- Otomastis Langsung Terbaca File Backup tadi
- klick dan Centang Semua
- Reboot
- Tunggu prosesnya 2 sampai 3 menit ( Lama Tidak Masuk Home Screen ,lepas Baterai dan hidupkan kembali tunggu sampai Proses Loading selesai }
- FINNIS
Selamat Mencoba
Semoga Berhasil
belum jelas tanyakan di kolom Comentar
BIG THANKS ALL
LINK BACKUP STOCKROOM ANDROMAX Qi
download file now
Saturday, August 19, 2017
Transfer Bulk Data via Torrent file
Transfer Bulk Data via Torrent file
Hi Friends,
This article is all about the Torrent File Transfer Mechanism and its features. How to optimize Torrent client and how to create our own Torrent file for transferring bulk data instead downloading Movies and Software from other Torrent sites.
What is Torrent?
Torrent is the protocol for distributing files. It uses Peer-to-Peer data transmission. Its advantage over plain HTTP is that when multiple downloads of the same file happen concurrently, the downloaders upload to each other, making it possible for the file source to support very large numbers of downloaders, with only a modest increase in its load.Torrents peer protocol can operate over TCP or uTP.
Torrent is created by Bram cohen in 2001 and now handled by BitTorrent.inc company
Torrent file distribution consists of these entities:
- An ordinary web server
- A static metainfo file
- A Torrent tracker
- An original downloader
- The end user web browsers
- The end user downloaders
Torrent Files
Torrent files are also known as metainfo files which are bencoded dictionaries which contains metadata like name, piece length, pieces, length, path and announce URL for trackers
Trackers
Tracker GET requests have the following keys:
- info_hash- Bencoded form of info values
- peer_id-Random generated id at the start of new download
- ip-Trackers machines IP address
- port-Port number for listening on peer
- uploaded-Total amount uploaded so far
- downloaded- Total amount downloaded so for
- left-Remaining amount has to download
- event-Announcement events such as started, completed, stopped(empty)
How Torrent Network works?
Seed is the user or computer that has a file can be downloaded. There are also so-called leechers/peers. Leechers are the users or computers who want to download the file. When one leecher has managed to download the files 100% of the seed, then the leechers role will change to seed. Therefore torrent source files are not fixated on single sources.
Advantage of Torrent
- It will be very faster when the files are being download by many users. But normal download will fail s to serve if number of downloaders increases.
- By downloading via torrent, the same file can be downloaded from many sources.
- The leecher can become seeder once the download complete to serve other leecher.
- It consume less CPU utilization compared to normal download.
- It allows to transfer files with anyone, anywhere.
Tips to optimize Torrent Client[Some Popular Torrent Client Softwares are BitTorrent, uTorrent, Vuze, qBittorrent.]
- Go to Options-> setup guide -> uncheck the bandwith
- Go to Options-> Preferences -> Advanced -> Change "net.max_halfopen" value to 50 by selecting the line, modifying the value at the bottom to 50 and clicking Set.
- At the same Advanced screen, Change "bt.transp_disposition" value to 255 by selecting the line, modifying the value at the bottom to 255 and clicking Set.
- More Peers means more speed, To get more peers, right-click the entry on the list of peers , and click Update Tracker.
- Increase the number of connections by Options -> Preferences -> Bandwidth -> Number of Connections. Experiment by increasing the number of global/max connections in steps of 25
- Increase the speed of particular torrent by setting the download limit to unlimited and upload limit to very less.
How to transfer files via Torrent file.
Step 1: Create Built-in Tracker
a) Open the utorrent Software->Options->Preferences
b) Go to Connections and set the port number which is opened/unused

c) Then go to BitTorrent and set the IP/Hostname to report to tracker: [as your sender IP address]

d) And go the Advanced and set true for bt.enable_tracker and save the setting

Step 2:Create Torrent file
a) Click File->Create New Torrent
b) Select Source which you want to transfer
c) Give the Torrent Properties Tracker values as "http://[Sender IP Address][Port]/announce"
where Port and Sender IP Address are we already configured in tracker

d) Delete if any other trackers found other than our tracker.
e) Give tick Start Seeding and Private torrent. and press Create
Now this will create a .torrent extension file
Step 3:Download the file from any other system like as normal as we download movies using .torrent file.
download file now
Friday, August 18, 2017
Tutorial Online PPSSPP Via Tethering
Tutorial Online PPSSPP Via Tethering

kali ini bakal share Tutor Online Via Tethering/Hotspot
 Kelebihan :
- Gak pake kuotang
- Stabil (asal deket-deketan kayak yaranaika)
Kekurangan :
- Gak bisa maen jauh-jauh (MAN & WAN)
Work on:
 - Andro > Andro
- Andro > PC
- PC > PC
- dan seterusnya sampe berame-rame campur sari
Bahan :
- PPSSPP versi 1.0 dan keatas
- Asal semuanya memiliki fitur hotspot dan connect wifi, gak usah nyalain data!
Steps :
1. Un-centang Simulate Block Transfer, Timer Hack , dan Fast Memory
2. Centang Enable WLAN dan Built-in pro adhoc server di Tab NETWORKING
3. ganti semua player IP menjadi : (192.168.43.1)
4. Enjoy! (kalo misalnya masih gak bisa atau error, coba restart PPSSPP dan Tetheringnya)

download file now
Tuesday, August 8, 2017
Trik Internet Gratis XL Via HP Android Oktober 2014
Trik Internet Gratis XL Via HP Android Oktober 2014

Trik Internet Gratis XL Via HP Android Oktober 2014, 3 Inject Indosat Polosan oktober 2014, Inject Indosat No Forbidden No Limit, Inject Indosat Isat Paket FB, Download Inject Indosat Polosan oktober 2014, Inject Internet Gratis Indosat 3 aon Axis XL Telkomsel - inject telkomsel, inject axis, inject three 3 Aon, akun ssh premium gratis, inject telkomsel, inject xl, inject indosat, inject axis, inject 3
#Incoming Search Terms
Trik Internet Gratis XL Via HP Android Oktober 2014, Inject Indosat No Forbidden No Limit, Inject Indosat Isat Paket FB, Download Inject Indosat Polosan oktober 2014, inject telkomsel, inject axis, inject three 3 Aon, akun ssh premium gratis, inject telkomsel, inject xl, inject indosat, inject axis, inject 3, 3 Inject Indosat Polosan oktober 2014download file now
Saturday, August 5, 2017
Tutor Cara Mengganti Notif Batre Low via HH Root Only
Tutor Cara Mengganti Notif Batre Low via HH Root Only
Edit Battery Low Notification di Android Tanpa Menggunakan PC
Hello, kali ini saya mau berbagi tutorial cara mengedit Notifikasi Baterai di Android apabila sudah lemah (biasanya saat 15% akan muncul notifikasi tersebut)Untuk lebih jelasnya bisa lihat SS d bawah ini

Ok langsung saja caranya, pertama download dulu bahan2 yang di gunakan
1) Apk Editor *click to download
2) RootEx *click to download
Jangan lupa di install :p
Lalu langkah-langkahnya
0) ALWAYS DO WITH YOUR OWN RISK
1) Buka RootEx, masuk ke directory system root, jgn lupa mount as r/w
 |
2) Masuk ke system/app cari SystemUI.apk lalu tekan+tahan (hold) pilih Extract All, lalu close saja RootEx nya
 |  |
3) Sekarang buka ApkEditor, cari folder hasil ekstrak-an SystemUI tadi, lalu klik resources.arsc
 |
4) Lalu klik [strings] yang di pojok kanan bawah lalu pilih string
 |  |
5) Sekaramg edit notifikasi nya dengan kata-kata yang kita inginkan
 |
6) Jika sudah tekan tombol back, ketika ada konfirmasi save maka pilih OK, dan ketika muncul pilihan update changes to dictionary pilih Cancel, close ApkEditor nya
 |  |
7) Lalu hapus file resources.arsc.bak
 |
8) Next, buka RootEx lagi, cari folder ekstrak-an tadi, lalu buka folder SystemUI/res/drawable-hdpi cari file battery_low_battery.png nah ganti file ini dengan yang anda inginkan, INGAT file harus berupa .png, untuk resolusinya saya menggunakan 300x233 (Width x Height)
 |
*contoh file battery_low_battery.png punya saya (300x233)

9) Kembali ke folder utama SystemUI, tap menu, pilih multi-select, lalu centang semuanya, stelah itu klik Zip, beri nama SystemUI.apk
 |  |
10) Masuk ke folder hasil zip tadi akan ada file SystemUI.apk.zip, rename dan hapus .zip nya saja menjadi SystemUI.apk
 |
11) Lalu copy file SystemUI.apk tersebut ke system root pada folder system/app (lihat no 1), timpa file sebelumnya lalu ubah permission menjadi rw-r-r
 |  |
12) Reboot, Enjoy :D
13) Hasilnya? lihat lagi ke paling atas :v
IMPORTANT
bagi yang hang di step no 10 saat menimpa file SystemUI.apk yang lawas, matikan saja HH nya/restart, lalu masuk lagi ke folder system/app stelah itu ganti permissions lagi menjadi rw-r-r lalu reboot lagi..
It should be work!
Cara Aman
Walau sedikit ribet dan memerlukan bantuan PC tapi cara ini cukup aman..
Setelah selesai mengedit SystemUI nya (step no 10) jika tidak ingin mengalamai kendala hang seperti yang saya bilang di atas (IMPORTANT) tadi, yaitu dengan menginstall SystemUI melalui CWM
download flashable .zip nya disini *click
Lalu buka file .zip tersebut, buka system ? app ? DRAG n DROP file SystemUI.apk td *lihat pada gambar
 |
??
 |
lalu flash file zip tsb melalui CWM.. Good Luck! :D
*jika ada yg punya ApkEditor versi FULL dan work 100%, ane bagi ya gan :v
download file now
Subscribe to:
Posts (Atom)